Setting up Dynamics 365 Form Capture
Last updated 2 months ago
Setup Azure Application
-
Go to Azure App Registrations
https://portal.azure.com/#view/Microsoft_AAD_RegisteredApps/ApplicationsListBlade -
Click New Registration.
-
Enter the following details:
- Name: DOWO D365 Gravity Forms (Optional: Site Name)
- Supported Account Types: Single tenant
- Redirect URI: Leave blank
-
Click Register.
-
Copy the Application (Client) ID – this is your Client ID.
-
Go to Certificates & Secrets → New Client Secret.
-
Add a description and expiry (730 days recommended), then click Add.
-
Copy the secret value – this is your Client Secret.
-
Go to API Permissions → Add a Permission.
-
Choose Dynamics CRM.
-
Select Application Permissions.
-
Add user_impersonation.
-
Click Add Permissions.
-
Click Grant Admin Consent to activate the permission.
Configure Dynamics
-
Go to Power Platform Admin Centre
https://admin.powerplatform.microsoft.com/ -
Navigate to:
Manage → Environments → Settings → Users & Permissions → Application Users -
Click New App User.
-
Click Add an App and select the application created earlier. Ensure the App ID is correct.
-
Select the appropriate Dynamics 365 Organisation.
-
Assign the System Administrator role.
-
Click Add.
-
Open your Dynamics 365 instance (for example:
https://dowouk.crm11.dynamics.com/). -
Go to Settings.
-
Navigate to:
Settings → Feature Switches → Forms -
Enable Form Capture.
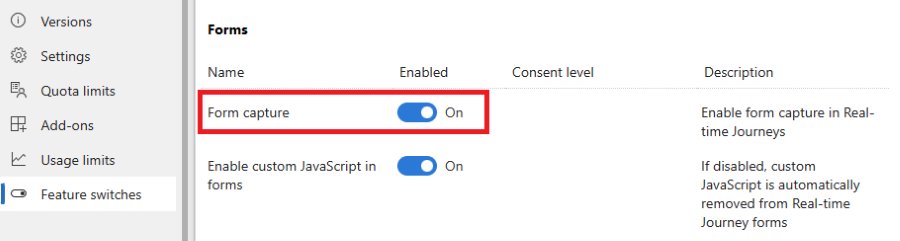
-
Click Save.
Note: Skipping steps 1-7 causes Test Connection to fail with
0x80072560 The user is not a member of the organization. Skipping steps 8-12 causes it to fail withHTTP 404 ... 0x80060888 Resource not found for the segment 'msdynmkt_marketingforms'.
Prerequisite: Form capture requires the DynamicsMKT_Forms solution version 1.1.35355 or higher. Newly provisioned and trial environments do not always have the latest version, so update Customer Insights - Journeys before enabling the switch. If the Form capture toggle is missing from Feature Switches, an out-of-date solution may be why.
Reference: Enable form capture feature switch
Configure Domain for Form Capture
-
Navigate to:
Email Marketing → Domains -
Click New.
-
Add the website domain hosting the form and enable:
- External Form Hosting
- Form Prefill
- Real-time Journeys
-
Click Add.
-
Add the provided TXT validation record to the domain's DNS.
-
Click Verify.
Required, not optional: the domain hosting the Gravity Form must be enabled for external form hosting, or submissions are rejected by CORS and never captured.
Reference: Domain authentication
Reference
- Capture forms in Customer Insights - Journeys - the official form capture documentation this plugin implements.
- Enable form capture feature switch
- Embedding the capture script and mapping definition
- Domain authentication